
Crochet is not an exact science.
At least its not for me.
Yes, there are times when you need to have your count just right, but as my niece (and crochet extraordinaire) says: Crochet is very forgiving.
It's true.
With that said, this is the first time I have ever come up with a pattern... and shared it.
Of course, this wasn't my idea at all...I was inspired by this post (which is a knit pattern) on Crochet With Raymond.
Its the story of my life really: I'm not a visionary, just a copy-cat with skillz.
So here we go.
Base Rows
I used a worsted weight acrylic (and a little bit of 100% cotton on flowers, also worsted) for the entire project.
I also used a size H (5.0mm) hook for the Teapot cozy.
Hooks for the flowers vary according to the patterns (links below). When not specified I used an F.
Beginning the Cozy:
With the color you want for the cozy, chain as many chains as needed (in multiples of two) for the base circumference - this measurement should be generous (meaning not snug.) You don't want it too tight.
For my pot I used 62 chains.
Add two more chains.
This is where the exact science comes in....
It doesn't matter how many chains your circumference is as long as it is an even number. So if you have an odd number of chains round up to the next even number, then (+2).
At this point you can, ever so carefully, joins your ends together (being careful not to twist it) with a slip stitch. Thus begins crocheting in the round.
OR, you can do what I did : Chain 62 + 2 more. Turn.
Chain one, *single crochet in the next stitch* Repeat * to end.
You should have your original number of stitches (i.e., 62 stitches + 2 stitches)
Then I go ahead and join the ends together using a slip stitch (in the first chain) as you would crocheting in the round.
All right. Are you with me?
First Rounds:
At this point you should have your starting chain (row 1), and a row of single crochet (row 2) with enough stitches to circle (loosely) the bottom of your pot; in a chain number divisible by two! And you've brought them together in a happy little circle.
Round 3 - chain 1, sc in the same stitch, sc in every stitch, sl to join.
Round 4 - ? - continue Round 3 until you're rounds reach the height of the bottom of your spout and handle... unfortunately I didn't photo this part but you can sorta see it in the next picture down and the bottom!
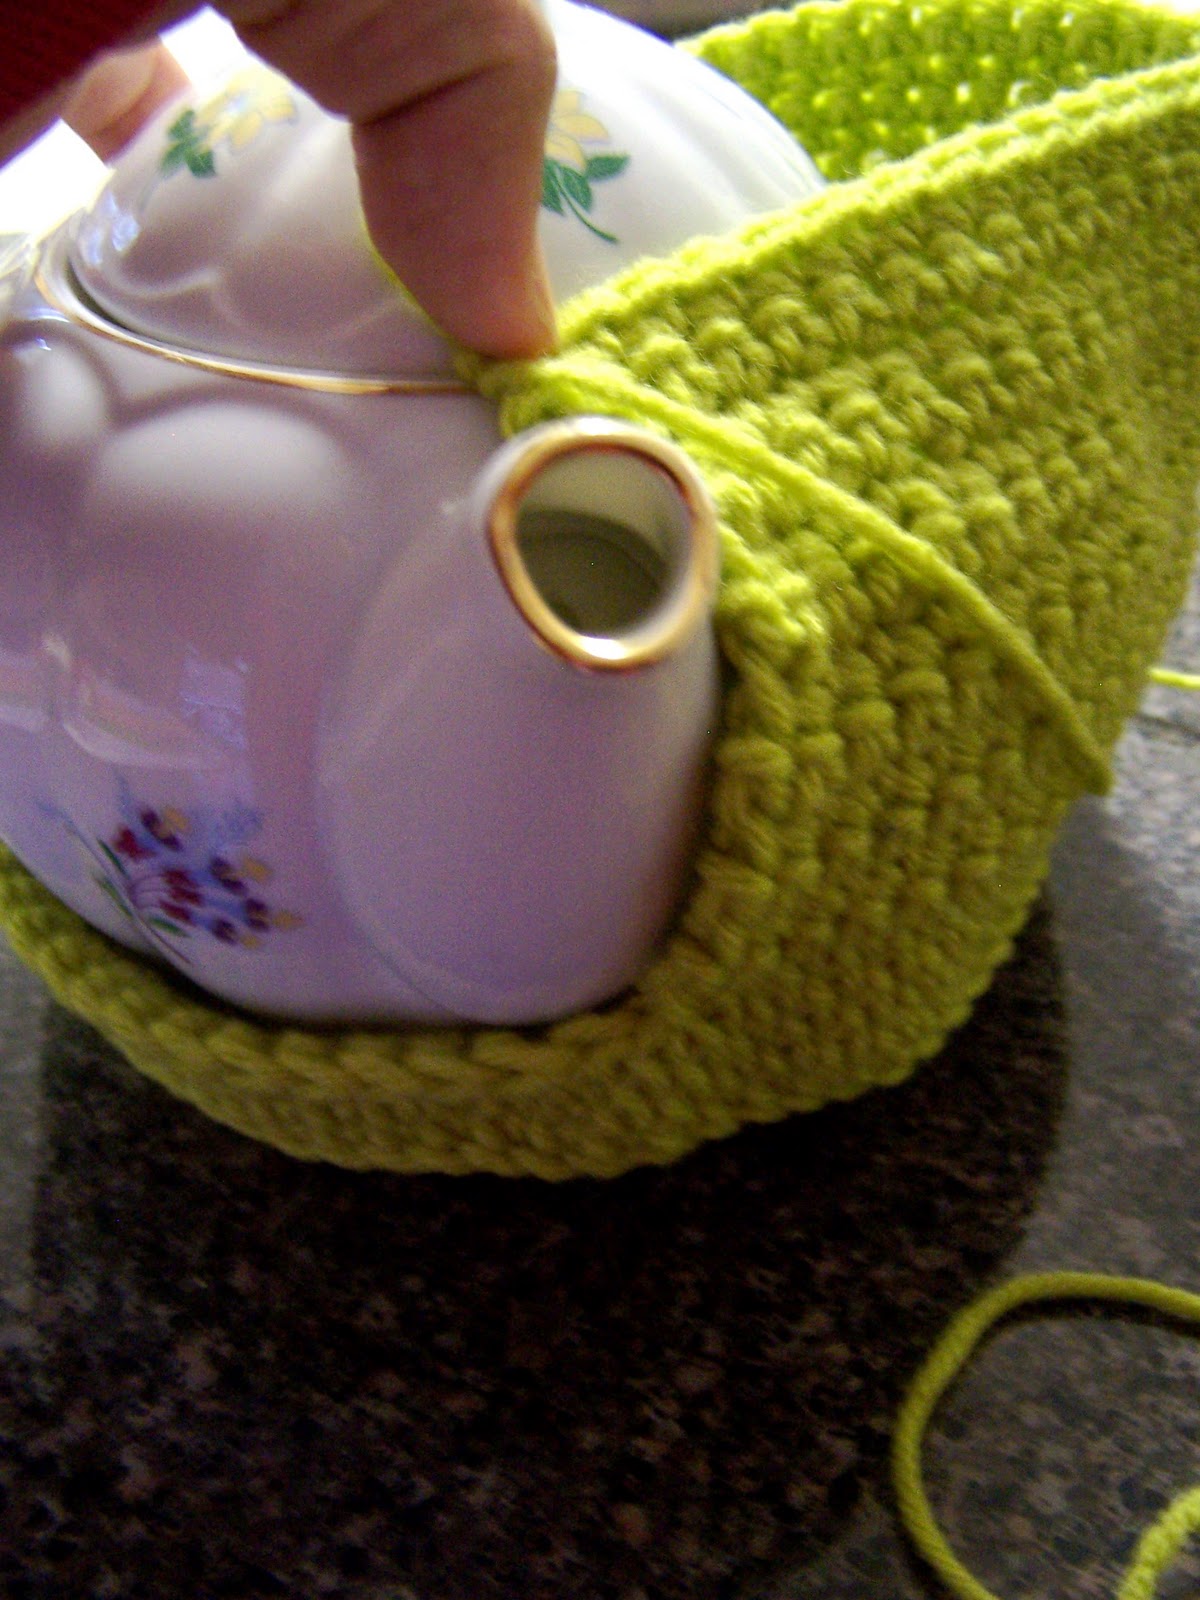
For my pot this was about 4 rounds. (Also my spout and handle were at about the same same hight...if yours isn't, go out quick and get another pot!)
When you get your rounds to the correct hight, then you are ready for the start of rows again.
Cozy Side Rows:
This is when you need to remember what your original chain set was!
Mine was original chain 62 + 2 (i promise that +2 is important!) When you do this row you are only going to do half of the original chain)
Row 1 - chain 1, sc in to the same stitch, sc in next (i.e., 31) stitches across, chain 1, turn.
Row 2 - (?) *sc in next 31 stitches, ch 1, turn*, Repeat * until the height reaches the top of your spout and handle.
For my pot this was about 12 rows.

Once you are satisfied with the hight, you need to get the other side done. I just did a slip stitch down the side, like this:

I wish is could tell you how many. I don't know. Just enough to get down to the base of my cozy.
This is where one of those extra stitches (+2) comes in...
Slip stitch into the next chain on the base row. (this will create a little space for the handle and spout to peek through)
Sc crochet in the next 31 stitches.
Repeat Row 1 and Row 2 for 2nd side.
Once you you are happy that both side are of the same hight and it fits your pot the way you like, its time to join 'em up and head to the next....

Second (decreasing) Rounds (top of Cozy)
Round 1 - slip stitch sides together, sc in the same stitch, sc all the way around, closing the other side up with a sc, and continue on.
(next rounds all decrease)
Round 2 - - ch 1, *single crochet in the next 6 chains, single decrease in the next two*. Repeat between * til end.
Round 3 - ch 1, Single crochet in the next 4 chains, * single decrease in the next two*. Repeat * til end.
Round 4 - (?) Keep on keeping on...this is really when I was just ready to be finished and began decreasing about every two stitches, and then every other stitch and then every stitch until the end. Because teapots will vary, you will have to decide how much decrease needs to be done and when...no worries if this part looks a little wonky, because flowers cover a multitude of sins.

Finish off. And weave in ends.
I did do a simple edge on the bottom of the cozy for whimsical looks and fun...
Edge:
Attach to any stitch in base with a chain one, single crochet into next stitch, *3 sc crochet into the next stitch, sl into to next chain*. Repeat * til end. Finish off. ad Weave in ends.
Make your flowers (my FAVORITE!):

Here are the link to these flowers starting with the middle and then going clockwise:
Middle: Daffodil
Dark Blue Flower/ yellow middle - I made this one up as I went along, but here is a great tutorial on a flower like this one.
Orange/red middle - supposed to be a daisy, but I made a mistake and had to improvise...here's what it's supposed to look like.
Purple Orchid
Red rose
Strawberry Blossoms
Zinnias (Blue and purple) - purple didn't make the cut...
Not pictured, but so very important... Lily of the Valley
Leaves
My leaves were all a variation on this tutorial I found nearly a year ago...once you get the the basic done you can go WILD and make leaves of all sizes and width!
Leave a long finishing tail on all flowers and leaves.
Once I had all flowers and leaves finished, I pinned the leaves where they told me they should go:

Then I sort of placed the flowers on top to see if the leaves fit.

Then I used the long finishing tails to sew all the leaves and flowers into place with a darning needle.
And soon it looked like this....

And the other side....

And her she is with her sister...

I'm no professional...it's taken me nearly 3 hours to write this thing out...so I am sure its got some holes in it.
If you have any questions feel free to leave them in the comments and i'll do my best to clarify...
Until then, go forth, and make your teapots beautiful!


8 comments:
Very cute tea cozy. Grandma Maude would be so proud!
So cozy and yet so spring-y. I'm going to have to come back and print this off. Then, when I'm ready, I'll set my phone beside me, and call you so you can step me thru it anyway. :) Not that your tutorial isn't great--just that I'm such a neophyte and love your company. So...it's a win-win.
Hi Kellie!
I was hunting for an e-mail address to e-mail you privately, but sorry, I couldn't find one!
Just to let you know I really enjoy seeing my creative ideas going out into the world and love seeing all the variations that appear! However just a friendly note regarding common copyright, I would prefer it if you didn't publish any of my photos or replicate my patterns on your page, but of course, very happy for you to continue leaving a link for people to follow! Thank you so much and have fun with your lovely crochet!
Kind regards, Alice.
Alice,
Thank you for letting me know your feelings.
I never intended for anyone to think I took credit for your creative idea, which is why I clearly referenced (and linked) to you, and your blog site, both times I mentioned this project.
However, I'll respect your wishes in the future.
Kind Regards,
Kellie
How interesting, Alice... Anything you put out on the internet like this is public domain. If you don't want it shared, don't share it.
Lovely tutorial, Kellie!
After visiting Alice's blog, I think she just needs to get a life.
I'd never have the patience to do any of these crochet crafts, but your tutorial is really great! If I was going to learn, it would be from you!
Olá Kellie
Muito bom tutorial!Andava procurando um e encontrei no seu blog. Parabéns!
Adorei passar aqui no seu fresco e alegre blog.
Levo o tutorial comigo e agradeço.Quando estiver pronto venho dizer :)
Continuação de uma ótima semana
bjs dos Açores
Nélia
Post a Comment