Friday, February 18, 2011

Paper Flowers: A Lesson from my Nana


Three days before I went home to Arizona for Christmas, my Nana died.

One of my favorite memories of her was during the time of my 15th birthday.

I had the privilege to celebrate my fifteenth year with a Quincenera.

This is a big celebration in the life a young Latina girl, and its a big deal.

My color theme was yellow. Its my mom's favorite color, and it was perfect for a fall September day in Southern Arizona.

I don't remember the details, but I do remember my Nana coming to the house with tissue paper and white chenille stems (aka - pipe cleaners.)

I remember sitting at our large dining room table and putting our hands to work.

We made a plethora of paper flowers that day, her and I.

I've been making these flowers ever since.

Twenty-three years later the tradition continues...

Grab some supplies and join me around my big (cyber) table...there's plenty of room here...

How to make a Tissue Paper Flowers

Supplies needed:
Tissue paper
Pipe Cleaner (or if you are completely out of pipe cleaners, steal a twisty-tie from the loaf of bread in an act of desperation.)
Scissors
Tape (to affix to present, optional)
Directions:

Take several pieces of tissues paper, and stack them on top of each other. It doesn't matter what size...bigger for large flowers, small for petite flowers. (I used three pieces of a large rectangle and cut them in quarters)

My flower started with a 12 layer stack.

Fold your paper accordion style, starting from the longest side.


Use your twisty-tie, or chenille stem, and place it in the middle.

Fold the sides up toward the middle just a bit.
If you like, you can cut the edges to give your flower a little more personality.

I did a little wave, which will make my flower look a little peony-esque.
Carefully start to pull the tissue, sheet by sheet, toward the middle. Gently twisting and folding paper into place.

Soon it will look like this...


Stick some tape onto the bottom and stick it to a present, or ti anything you want to add some happiness too.

Below is a picture of my Nana, who was probably not much older than I was when she taught me to make these flowers.

For these things, I will always be grateful.

0007358873-01_011034.jpg

Thursday, February 17, 2011

Baiting Spring

Several of you asked about what I am doing to prepare my garden for the spring.


It isn't much, but it makes me feel better...like I am doing my part to bring on the spring.

Basically, I stirred up the soil and gave it some fertilizer. Then I covered it with some plastic, and put the windows over it - its my attempt at a little green-house effect.

I'm doing this in part because I want the heat of the sun to bake the moist soil a bit. I also have some hay from last year's garden that I am hoping will break down a bit.

(Last year I did Hay-bale gardening...which I enjoyed but decided not to to this year (I'll post more about that next week.)

The Mister built me another raised-bed to place where last years hay-bales went.


I'll keep them all covered for at least 4 weeks, then I'll turn the soil and fertilize one more time and cover and let rest...that's always the hard part for me.

Hopefully in six weeks time, I'll be planting seedlings and watching my garden grow.

Until then, I followed the advice of my friend The Seasoned Sister, and bought an Amaryllis bulb and some other kind of flower whose package said, "grows quickly" and "suitable for containers". What I really wanted was a Narcissus called a Paper White (also on recommendation of the SS, because they grow fast!) but I went to three different places and was denied...so i just went with what I could find.

So far....this is what I got.

Its' been four days.

And I check on them several times a day like a newborn.

OCD much?

Nah. Not me.

Wednesday, February 16, 2011

Random Thoughts from Kellie's Brain: Ancient History

In 20 minutes I'm going to be teaching on Ancient Greece to a handful of bright grammar students.

I really should have listened to Mrs. Rod when I she taught on Ancient History in the eighth grade.

I know she taught us all about the war of Marathon and about a guy named Xerxes; I am sure we read about conflict between the Greeks and Persians, but for the life of me, I cannot remember.

So, I'm learning all over again.

What I DO remember is going to retreat many, many years ago when my kids were babies. The speaker was the wife of a professor from Dallas Seminary. She had been married for many decades and was enjoying the retired years.

I have no idea what her theme was that weekend but I remember two things: That in her house, when she was raising kids and set boundaries that were of the utmost of importance, she told them they were bound by the "Law of the Medes and Persians," which meant that that rule could not, under any circumstances, be broken. Or else.

After studying ancient history this week, I finally I understand what she was talking about.

The second thing I took home from that weekend is probably the BEST piece of marital advice I have ever received: Feed your man.

She said that if you ever needed to tell him something important, or ask for something, or generally need him to be attentive...the best way to do that was to make sure his belly was full.

She was absolutely right.

That bit of advice will never be ancient history.

And that is this months installment of Random Thoughts from Kellie's Brain.

Tuesday, February 15, 2011

Bragger

Several years ago The Mister and I were given an entertainment center from some friends.

It was a beautiful oak piece that we enjoyed (and I used as in my office to hold fabric and craft supplies) but eventually I grew tired of its bulk.

(I'm not even ashamed to show this old pic of my office....y'all, sometimes life is just a mess.)

I asked if he would build me some smaller shelves so I could get rid of the entertainment center.

He graciously did so.

And then I painted them the prettiest color blue I could find.

However, he was sad to see all that wood go to waste so he took that oak shelving unit apart; painstakingly taking out hundreds of wood staples, and said he would figure out what to do with it someday.

Being the supportive and generous wife I told him he could ''do whatever he wanted with it, as long as he kept in his garage.''

Nice.

Little did I know that he would turn that entertainment center into this:

Our new shoe-holder that sits in the foyer. It opens into three different compartments - one for each of the kids and myself. He built a separate shoe box that sits near the back door for his shoes.


Isn't it amazing?

I don't know how in the world he got this to all fit together so tightly with all the detail and trim.

I'm proud of him.

Many years ago he said he had always wanted to work with wood. To make things for our home and to be part of some creative process. Of course he has always been busy bringing home the bacon, but back then our kiddos were young and it was harder to invest time in the creative side of our lives.

(For you with young children: there WILL be time for creativeness again, I promise!)

Its been so fun to see him build his skills as a wood-worker...to fulfill a longing for creativeness that he has always wanted to pursue.

He doesn't know it yet, but soon he'll be building a new coffee table for our family room.

This weekend I was showing him how I was using the old windowpanes from our house to cover the garden beds after turning the soil.

He casually said, "You know, you could make a small green house using those windows."

Of course, he and I both know that that 'you' really meant 'him.'

I'll be adding that to the list.

Monday, February 14, 2011

A Love Blessing for You


Love...


...is what lives in the Little Yellow House on the Hill.

Love....

...is The Girl in my garden on a gorgeous afternoon... 

Love...

...is The Boy and a book on a beautiful day.

Love...

...Is The Mister in his favorite plaid shirt. 

(its my favorite too)

Valentine's are nice...

but I am thankful that Love...

isn't just for one day of the year...

or for just a chosen few...

but that there is enough 

Love

for everyone.

(1 John 4:10)


May LOVE dwell always in this house,

and in yours,

because...

When you live with LOVE

Your house will shine with His glory.

~~~~~

'God, I love living with You; 
Your house glows with Your glory...'
(Psalm 26: 8)

Saturday, February 12, 2011

Ruffly Return

Although I spent most of the week pining away for warmer weather and trying to get my groove back after being in Arizona, I did manage to get some work done.


Meet Ruffly #2.

Ruffly # 1 was debuted here.

This sweet scarf, we'll call her Heather (since that's the color given on the yarn package: Heather Grey) isn't going to stay here. She's spoken for, and will be going to her new home tomorrow...

But, no one will love her as much as me.

Friday, February 11, 2011

The Mercy of Winter

This week has been an interesting blend of catch-up and slow-down.

I think I felt a little bit of Spring fever this week.

I'm ready for some warm weather...

To get my hands out of the yarn...


 ... and into the earth.

I bought cucumbers and tomatoes this week at the store and longed to just pluck them from my garden.

I found myself looking for signs in the yard that spring is coming...

Where are the daffodils?

The Camellia?

I know its only the 11th of February... but it's that time of year when I long to see an end to cold. I want to feast my senses on the sights, sounds, smells and tangible hopes that come from the thawing of the earth.

Right now, in this resting time, when things are held back in sleep, I must choose to see the Mercy in winter... must plan to remember that... God set the boundaries of the earth, and made both summer and winter. (Psalm 74:17, emphasis mine), for His purpose and glory. 


Currently, its 19 degrees outside. Outside my window it looks like this:


But what rests beneath the dull-brown, seemingly life-less, branches is this:


In the fullness of His grace, we cannot have one without the other.

There is Mercy in winter... so I'll thrown on another scarf, a hat, some mittens...


... and patiently wait for spring.

Thursday, February 10, 2011

Veggie Straw Monster


I'll admit it... At first I was skeptical.

I had seen these Sensible Portion Veggie Straws, and assumed they were a fad-snack meant to make vegetables palatable for those who don't like them.

Today I do believe I could be classified as an official Veggie Straw Monster, made worse by the finding of a companion snack of the sweet kind.

Last summer, while having snacks at the pool, my friend Elisa, whipped out a bag of Veggie Straws and offered me some.

I had seen these before, but thought they were some kind of foodie trend. I mean, I actually like veggies, but come on, Veggie Straws? The name just turned me off.

However, being of the snack-y kind, (and not wanting to be rude), I did what any good eater would do: I tried them anyway. 

And was immediately hooked.

As a matter of fact, I kept reaching for more, and soon had to remove myself from the picnic bench for fear of embarrassing myself. After-all, my kids were off swimming so I couldn't even blame the near-empty bag on them.

I've pretty much kept a bag in my cupboard ever since.

Don't get me wrong. I know this is a snack food, not meant to be eaten as a vegetable replacement. I highly doubt they would even count as a veggie serving, but they're tasty...very tasty.

Its a sickness, my enjoyment of the Veggie Straws...they are light and crunchy, and potato-y...its like eating lightly salted air. It's replaced microwave popcorn, because you don't have to wait 3.5 minutes for it to cook.

But now, its ten-times worse.

Two days ago I was in my favorite buy-in-bulk-warehouse store and I spotted a new product by the makers of Veggie Straws: Apple Straws.

Seriously, its like eating a crunchy, lightly-sweet apple pie, but without all that unpalatable cooked fruit.

Sensible portions? I don't think so.

Don't let that modest handful of veggie straw trick you in the picture above (for heaven's sake, look at the size of that sandwich.) I ate one or fifty before the camera starting rolling.

So tell me...what is your favorite snack these days?

Wednesday, February 09, 2011

Crochet Teapot Cozy Tutorial


Crochet is not an exact science.

At least its not for me.

Yes, there are times when you need to have your count just right, but as my niece (and crochet extraordinaire) says: Crochet is very forgiving.

It's true.

With that said, this is the first time I have ever come up with a pattern... and shared it.

Of course, this wasn't my idea at all...I was inspired by this post (which is a knit pattern) on Crochet With Raymond.

Its the story of my life really: I'm not a visionary, just a copy-cat with skillz.

So here we go.

Base Rows

I used a worsted weight acrylic (and a little bit of 100% cotton on flowers, also worsted) for the entire project.

I also used a size H (5.0mm) hook for the Teapot cozy.

Hooks for the flowers vary according to the patterns (links below). When not specified I used an F.

Beginning the Cozy:

With the color you want for the cozy, chain as many chains as needed (in multiples of two) for the base circumference - this measurement should be generous (meaning not snug.) You don't want it too tight.

For my pot I used 62 chains.

Add two more chains.

This is where the exact science comes in....

It doesn't matter how many chains your circumference is as long as it is an even number. So if you have an odd number of chains round up to the next even number, then (+2).

At this point you can, ever so carefully, joins your ends together (being careful not to twist it) with a slip stitch. Thus begins crocheting in the round.

OR, you can do what I did : Chain 62 + 2 more. Turn.
Chain one, *single crochet in the next stitch* Repeat * to end.

You should have your original number of stitches (i.e., 62 stitches + 2 stitches)

Then I go ahead and join the ends together using a slip stitch (in the first chain) as you would crocheting in the round.

All right. Are you with me?

First Rounds: 

At this point you should have your starting chain (row 1), and a row of single crochet (row 2) with enough stitches to circle (loosely) the bottom of your pot; in a chain number divisible by two! And you've brought them together in a happy little circle.

Round 3 - chain 1, sc in the same stitch, sc in every stitch, sl to join.

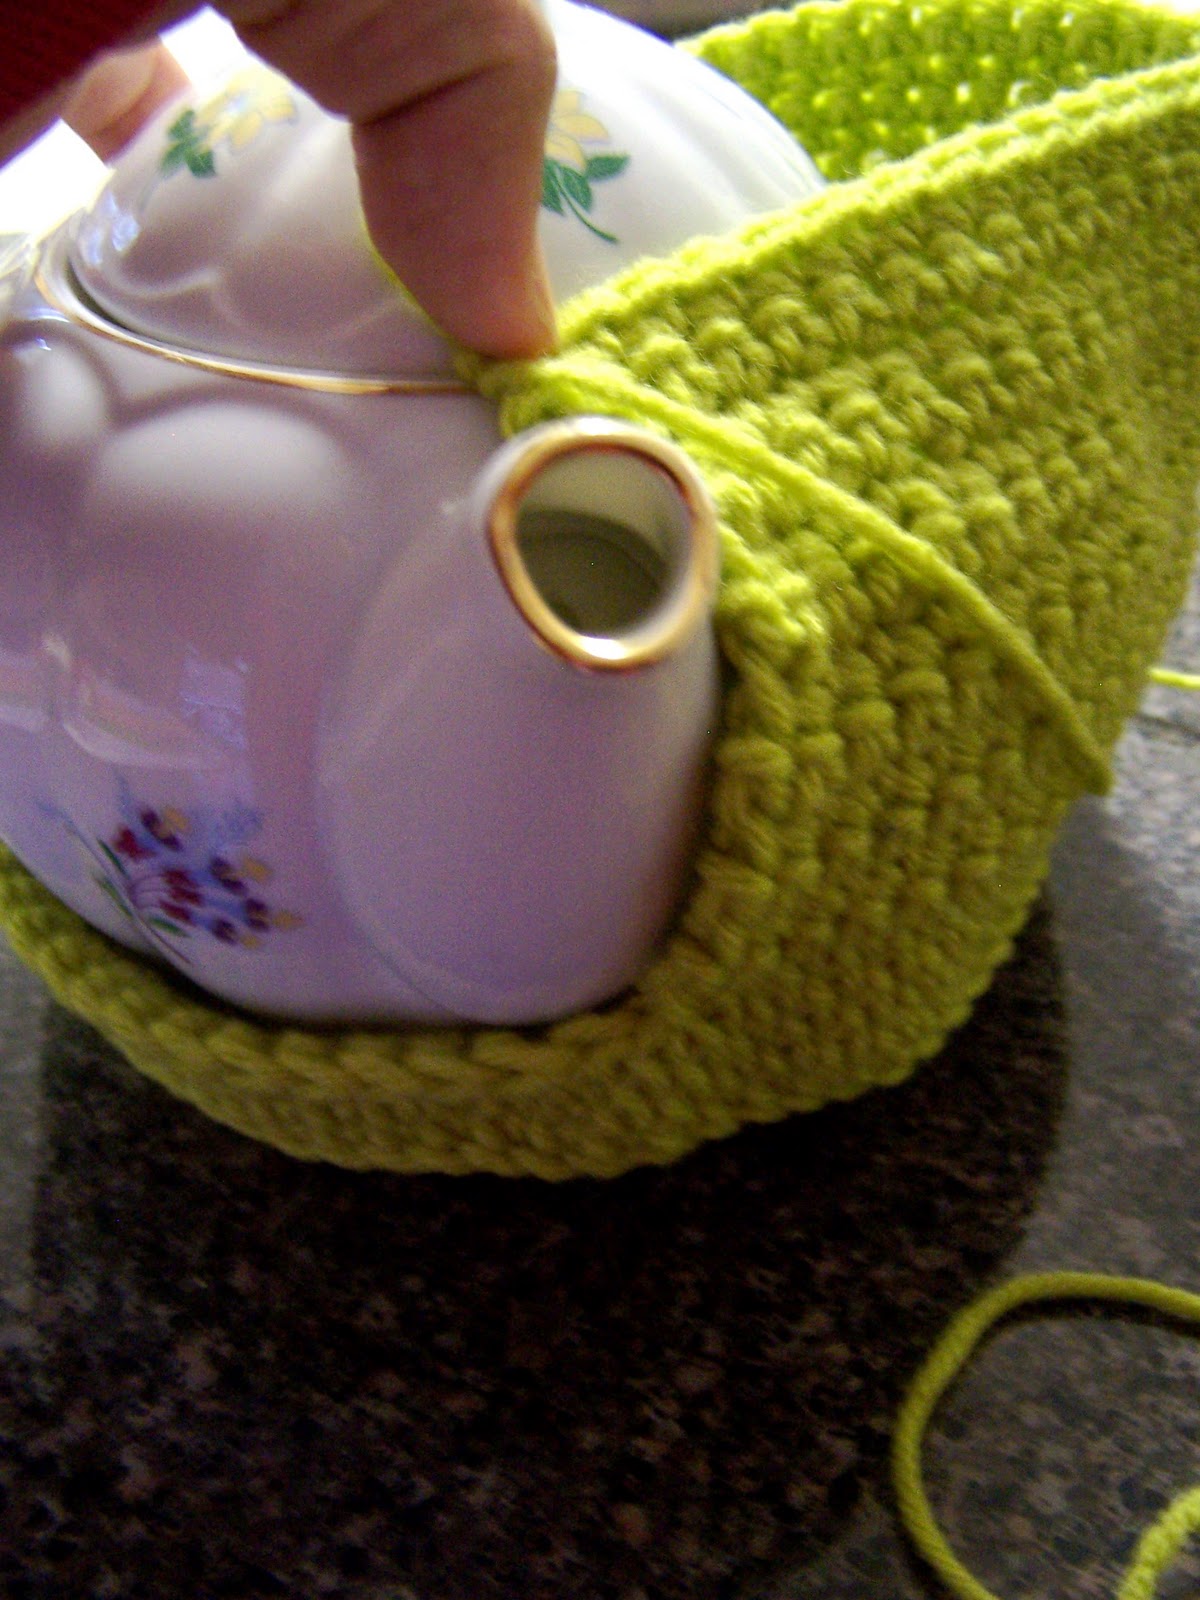
Round 4 - ? - continue Round 3 until you're rounds reach the height of the bottom of your spout and handle... unfortunately I didn't photo this part but you can sorta see it in the next picture down and the bottom!

For my pot this was about 4 rounds. (Also my spout and handle were at about the same same hight...if yours isn't, go out quick and get another pot!)

When you get your rounds to the correct hight, then you are ready for the start of rows again.

Cozy Side Rows:

This is when you need to remember what your original chain set was!

Mine was original chain 62 + 2 (i promise that +2 is important!) When you do this row you are only going to do half of the original chain)

Row 1 - chain 1, sc in to the same stitch, sc in next (i.e., 31) stitches across, chain 1, turn.

Row 2 - (?) *sc in next 31 stitches, ch 1, turn*, Repeat * until the height reaches the top of your spout and handle.

For my pot this was about 12 rows.


Once you are satisfied with the hight, you need to get the other side done. I just did a slip stitch  down the side, like this:


I wish is could tell you how many. I don't know. Just enough to get down to the base of my cozy.

This is where one of those extra stitches (+2) comes in...

Slip stitch into the next chain on the base row. (this will create a little space for the handle and spout to peek through)


Sc crochet in the next 31 stitches.

Repeat Row 1 and Row 2 for 2nd side.


Once you you are happy that both side are of the same hight and it fits your pot the way you like, its time to join 'em up and head to the next....

Second (decreasing) Rounds (top of Cozy)

Round 1 - slip stitch sides together, sc in the same stitch, sc all the way around, closing the other side up with a sc, and continue on.

(next rounds all decrease)

Round 2 - - ch 1, *single crochet in the next 6 chains, single decrease in the next two*. Repeat between * til end.

Round 3 - ch 1, Single crochet in the next 4 chains, * single decrease in the next two*. Repeat * til end.

Round 4 - (?) Keep on keeping on...this is really when I was just ready to be finished and began decreasing about every two stitches, and then every other stitch and then every stitch until the end. Because teapots will vary, you will have to decide how much decrease needs to be done and when...no worries if this part looks a little wonky, because flowers cover a multitude of sins.


Finish off. And weave in ends.

I did do a simple edge on the bottom of the cozy for whimsical looks and fun...

Edge:
Attach to any stitch in base with a chain one, single crochet into next stitch, *3 sc crochet into the next stitch, sl into to next chain*. Repeat * til end. Finish off. ad Weave in ends.

Make your flowers (my FAVORITE!):


Here are the link to these flowers starting with the middle and then going clockwise:

Middle: Daffodil

Dark Blue Flower/ yellow middle - I made this one up as I went along, but here is a great tutorial on a flower like this one.

Orange/red middle - supposed to be a daisy, but I made a mistake and had to improvise...here's what it's supposed to look like.

Purple Orchid

Red rose

Strawberry Blossoms

Zinnias (Blue and purple) - purple didn't make the cut...

Not pictured, but so very important... Lily of the Valley

Leaves

My leaves were all a variation on this tutorial I found nearly a year ago...once you get the the basic done you can go WILD and make leaves of all sizes and width!


Leave a long finishing tail on all flowers and leaves.

Once I had all flowers and leaves finished, I pinned the leaves where they told me they should go:

Then I sort of placed the flowers on top to see if the leaves fit.


Then I used the long finishing tails to sew all the leaves and flowers into place with a darning needle.

And soon it looked like this....

And the other side....

And her she is with her sister...


I'm no professional...it's taken me nearly 3 hours to write this thing out...so I am sure its got some holes in it.

If you have any questions feel free to leave them in the comments and i'll do my best to clarify...

Until then, go forth, and make your teapots beautiful!

Tuesday, February 08, 2011

Flowers and Birthdays and Yarn. (Oh My!)

Last week The Girl turned eleven. In my absence several people went out of their way to make the day special. That gorgeous tulip was brought by her BBF (British Best Friend). Actually it was a bouquet of tulips. I am determined to figure out a crochet pattern for this flower...look how amazing it is with all its purple-y, yellowish love.

Speaking of crochet...Yesterday I promised to show you a hat I was commissioned (doesn't that sound fancy!) to make:
This is the Daffodil side....

And this is a (not so good) shot of the Orchid.

You really don't know how long I deliberated over which flowers to place on this hat... as if the whole world depended on it. But I think these are nice and springy and I cannot wait to see a certain Twinkie Girl wearing it.

Also, are you sitting down?

I know some of you have been waiting ever-so-patiently for a certain Tea Cosy Tutorial. Tomorrow is your lucky day! I am finishing up the flower making, photo taking, and pattern baking (it was the only -ing word I could think of) and it will be up by tomorrow. I am so excited to share this with you!

There have been a few of you who have asked if I will have some tea cozy's to sell... At the moment, I'm  only taking custom orders. So if you want something made, email me! I have two crochet orders in the cue right now, and they will be finished by the end of the week. I'm trying to fund a trip to NYC so now is the time to order! ;)

Last, but certainly not least...here is my Girl celebrating 11 wonderful years!

Love. This. Child.

Monday, February 07, 2011

Home is Where the Heart Is


The last ten days were nothing like I expected. I thought I would have time to blog and crochet while I waited by my mom's bedside. I learned its hard to focus on anything else when someone you love is struggling...

The good news is that my mom is doing well. Its been tough, but she's a trooper!

For those of you who hadn't heard, my mom had a quadruple Coronary Artery Bypass Graph thirteen days ago. 

I went home to Arizona to be with her and my dad. I just returned home last night.

Life carried on here in The La Vida House while I was away. There were basketball games and birthday parties and even some house cleaning! Everybody stayed fed and watered and managed to get exactly where they needed to be at the right time and day.

I'm thankful for My Mister. He did a good job. 

I want to catch you up on the last 10 days, specifically things I am grateful for... but I am still processing through much of it.... so lets talk about crochet!

The day before I left, I tricked my friend Becky into coming over for lunch with full intentions of putting her to work. 

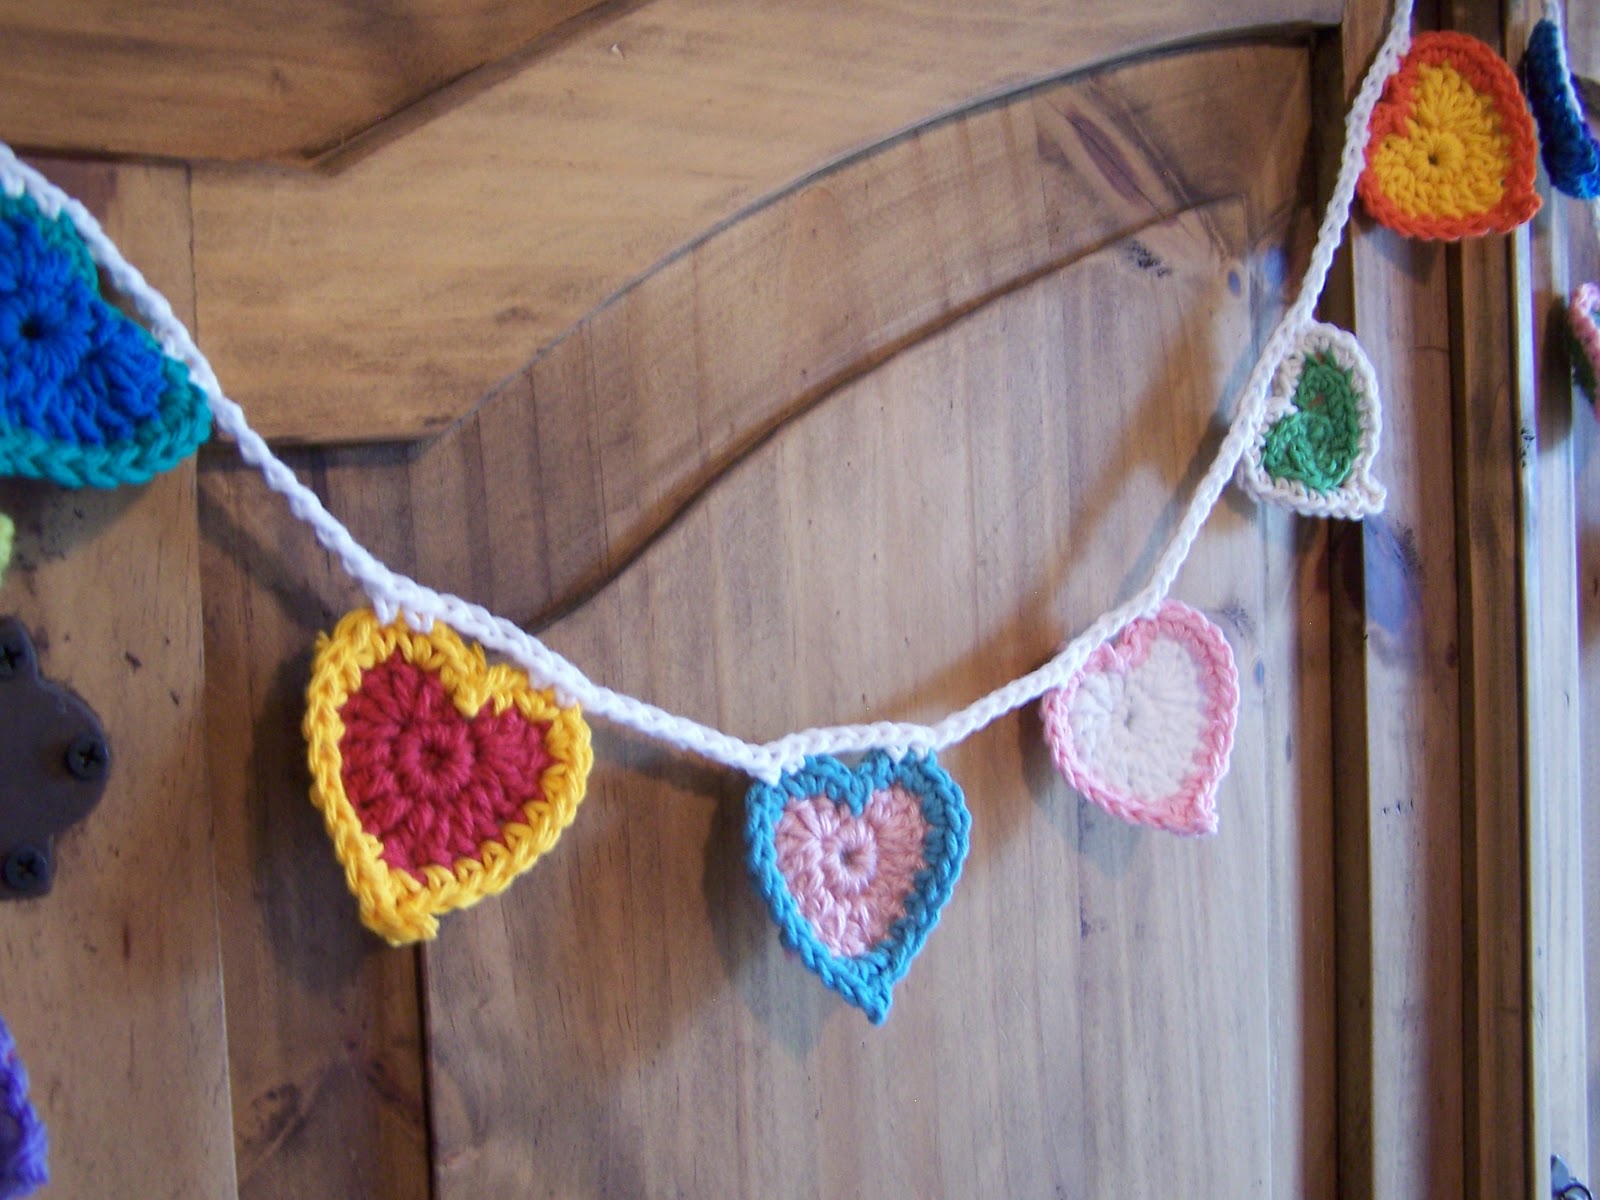
She too is a crafty girl who knows how to crochet, so we made this heart garland for my moms hospital room.


I followed this pattern  but I added a twist....on Round Three I added a picot on the second of the three single crochets that make up the point. I wanted my hearts a little more pointy.

We whipped this project out in a couple of hours and still had time to eat grilled cheese sandwiches with salad. And these amazing cookies that The Girl made... which were very easy and pretty delicious! The recipe yields 7-8 large cookies, but the caloric intake is frightening. We made smaller cookies and got double the amount.


We were all quite proud of ourselves!

In all the busyness in Tucson I forgot to take a picture of the bunting hung in her hospital room; it made it look a lot more cheery. 

Right now its hanging in her own bedroom, so she'll know that my heart is with her as she recovers....

Tomorrow I'll show you an adorable (if I don't say so myself!) spring-time hat I made before I left. But right now I'm going to brew another cup of coffee and go hang out with my kids...

xoxo

Wednesday, January 26, 2011

Random Thoughts from a Scattered Brain

Yesterday was a long day...and I can't imagine how long it felt for my dad and brothers.

My mom made it through surgery and now begins the process of recovery.

I spoke to my dad around 7am this morning and (as of that time) she was still on a ventilator and needed a unit of blood overnight, but was otherwise doing the same. I'm praying that she will perk up this morning so she can get off the vent and get going on her recovery.

In between constant chain-praying, I have been scrambling to prepare my family for my not being here next week. Which means I have been shopping and tying up loose ends. Thankfully my sweet friend Becky gave me this portable list-keeper, and I have used that thing like crazy this week! (see pic below)

-I've kept my self occupied this week with gallons of hot coffee, a little bit of crochet, endless list making and a basketball game or two. I was also very grateful for the little bit of happiness  that happened yesterday as I was in the Target.

I had forgotten that its that wonderful time of year when York Peppermint Patties are made Valentine style.

I don't know what it is about this candy, but I love me a mint. And when that mint happens to be heart shaped and light pink inside...well, that's just a little bit of perfection for this sappy soul.

Its the little things, you know?

- I was also grateful for a quick cup of tea with a friend, and hearing from friends and family throughout the day.

- Today is busy, and I am trying not to freak out that my iPad is suddenly refusing to turn on...so I think I'll log off and try to get to the Apple store speedy quick...

- The Girl has been flipping through my new Cookie cookbook (Thank you Tracy V!) and is insistent that we make the Chocolate Whoopie Cookies pictured on page 418. I bought the ingredients, and then came home and read the nutritional content, which was a bad idea...turns out Chocolate Whoopie cookies have over 630 calories per cookie, and you don't even want to know how much fat. I kind of wish I didn't know.

So that's it...random thoughts from a scattered brain.